Tuesday, September 13, 2011

Lemon Cake

About 8-10 slices


Ingredients
125g salted butter (softened)
150g caster sugar
2 eggs (room temperature, lightly beaten)
180g self raising flour
1 lemon 
Optional: A handful of almond flakes

Method
- Preheat oven to 180 degree C and greaseproof a 24cm round tin and line the base with baking paper. 
- Grate the rind of the lemon and then squeeze the juice, strain and set aside. 
- In your mixing bowl, cream the butter and sugar using an electric mixer until light and fluffy.
- Add about 1/3 of the egg into the creamed mixture and beat till incorporated, then add 1/3 of the flour into the mixture and beat well. Repeat the steps until the egg and flour have all been mixed. 
- Using the spatula, stir in the lemon rind into the mixture till smooth. Add the lemon juice and mix well.
- Transfer the mixture into the baking tin and smooth out the surface. 
- Lightly lay the almond flakes on the surface of the cake mixture. 
- Bake for 22 - 25 minutes until a toothpick inserted in the centre of cake comes out clean.
- Remove from oven and let it cool for about 10-15 mins before removing from tin. 
- Serve warm.


To make the lemon glaze (I skip this as I don't like my cake too sweet)
- Grate the rind of another lemon.
- Squeeze the lemon juice into a small saucepan. Over low heat, add 25g of granulated sugar to the lemon juice and stir occasionally.
- When the sugar has dissolved, simmer for another few minutes until it turns syrupy. 
- Prick the cake all over using a fine skewer and spinkle the lemon rind over the top. 
- Drizzle the lemon syrup over the the top of the cake and leave to cool in the baking tin. 
- The cake will soak up the lemon syrup giving it a gooeyness texture.


Rosemary Lemon Tuiles

After watching Jamie Oliver's cooking show on TLC, I am so inspired to have my own herb garden. I know I'm unlikely to succeed given the (lack of direct sunlight) conditions at home, nonetheless, I will want to give it a shot! So over the weekend, we bought 3 potted plants - Rosemary, chilli and mint. 

My rosemary plant is so luscious and scented (at the moment!) ; I am very glad to try this recipe with fresh rosemary leaves plucked from my beautiful plant! This makes an excellent tea time treat. 

Makes about 20

Ingredients
Egg white - 2 
Caster sugar - 70g
Plain flour - 50g
Unsalted butter - 50g
Fresh rosemary leaves - 1 sprig / 2 tsp
Lemon rind - from half a lemon
Orange rind - 1 tsp (optional)

Method
- Wash the rosemary sprig, pat dry and chop finely.
- Preheat oven to 190 degree C.
- Melt butter over low heat and leave to cool (faster if you use a microwave).
- In a mixing bowl, whisk the egg whites till it's white and fluffy. Stop when you lift up your whisk, you can see soft folds. You will also notice the mixture almost doubled in volume. 
- Gently whisk in the sugar and mix well.
- Gently fold in the rosemary leaves, lemon and orange rind, flour and melted butter.
- Lay baking tray with greaseproof paper. Using a metal tablespoon, scoop up the mixture till its almost spilling over and immediately place it on the tray. Using the back of the spoon, gently spread it evenly till it forms a thin disc of about 1-2mm. Repeat till the tray is filled up. 
- Bake for about 5-7 minutes till the centre turns golden and the side turns brown.
- Remove from oven and drape the freshly baked tuiles over a rolling pin to form a curve. 
- Serve while warm, goes well with your favourite ice cream or just a cup of freshly brewed tea. 

Tip
If you drop your tuile and it doesn't break into pieces when it lands, you know it's too thick!

Source: http://adrenalynne.blogspot.com/2009/11/rosemary-scented-citrus-tuiles.html

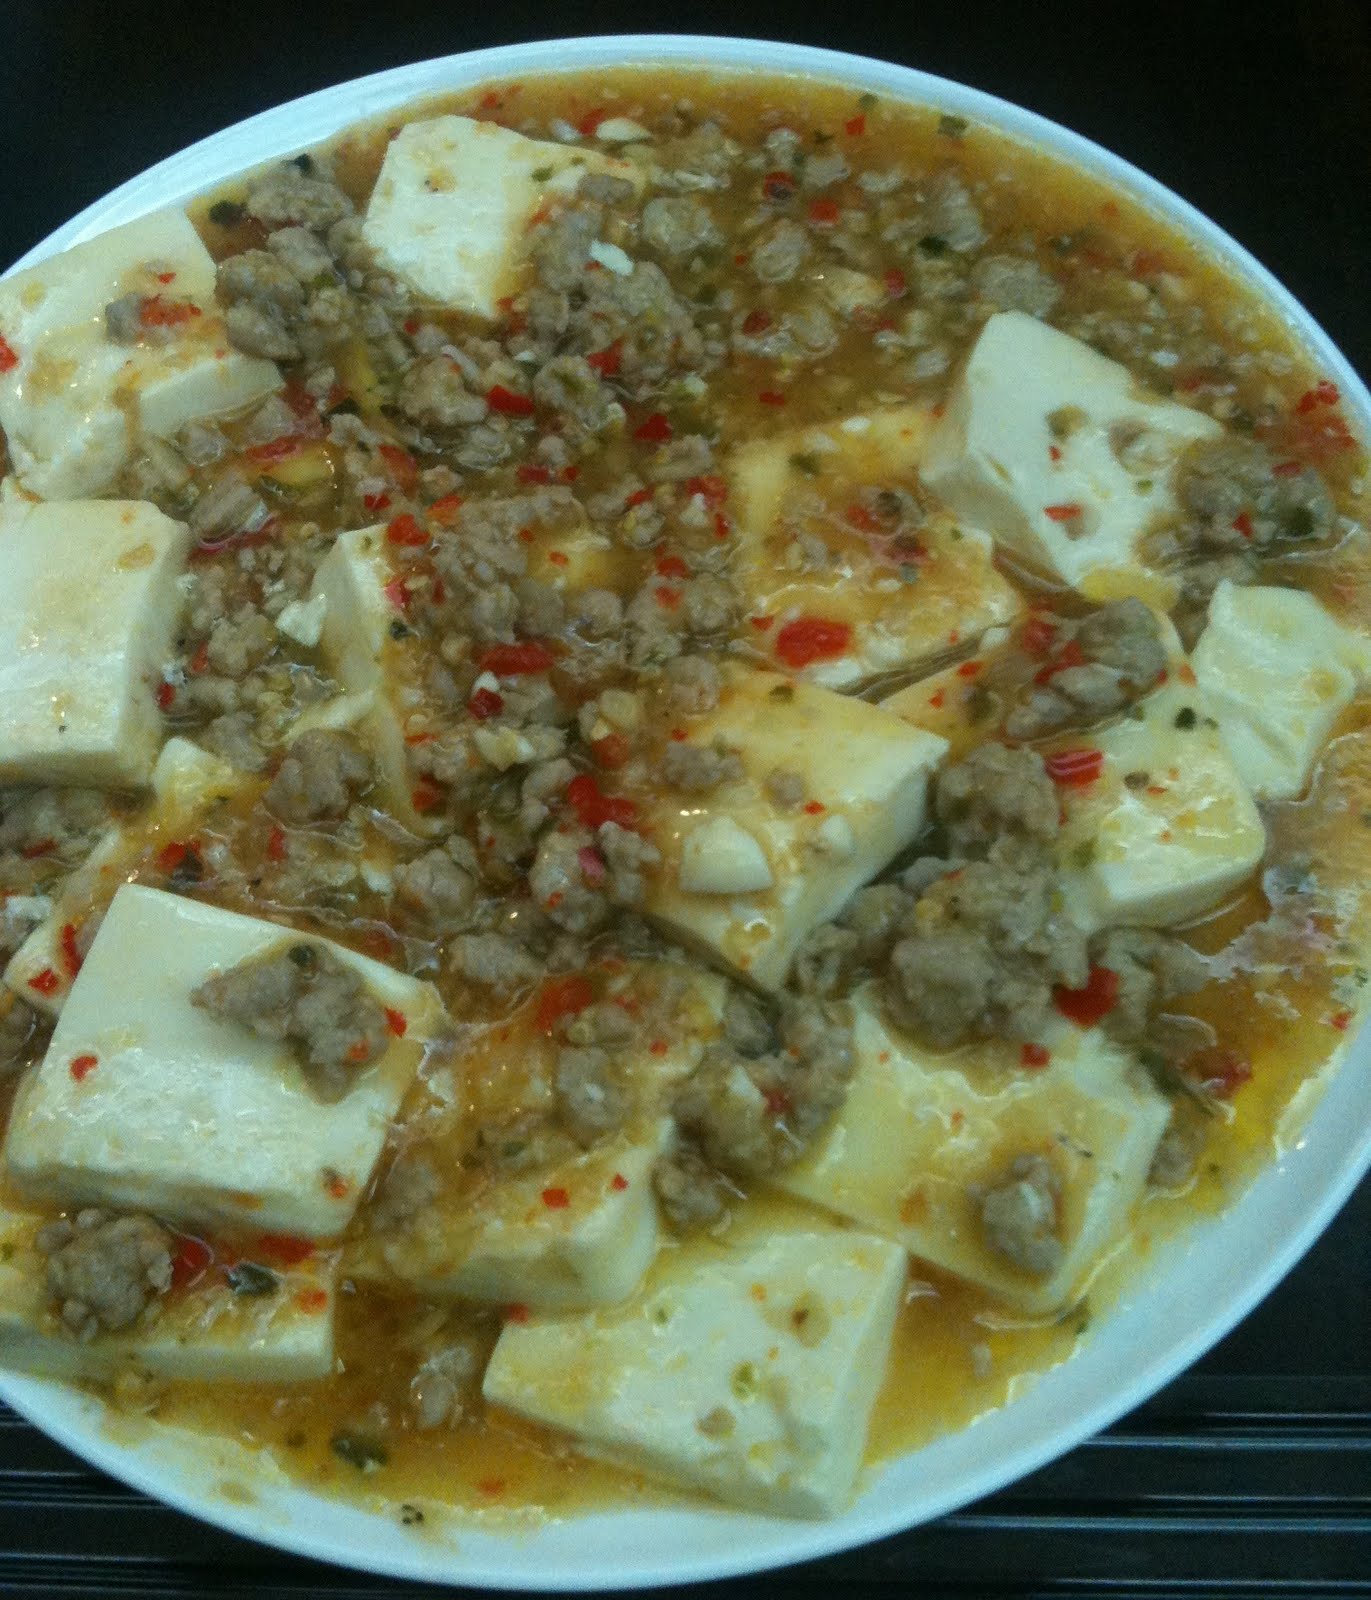
Spicy Tofu with Minced Pork

We went to Putien for dinner last weekend and their specialty chill sauce is so yummy that we bought a bottle for our own consumption. However, it can only keep for 2 months, so I am using it in my cooking too. This is the first dish I attempted using the chilli sauce and the husband loves it!


Serves 2-3


Ingredients
100g minced pork
1 pack of tofu (I cut it into 16 smaller pieces)
2-3 cloves of chopped garlic
Light soy sauce
Pepper
Hua tiao wine
1 heaped tsp of cornflour dissolved in 1/2 cup of water
3 tsp full of Putien chilli sauce

Method
- Pre-marinade the minced pork with light soy sauce, pepper and hua tiao wine.
- Using a frying pan, fry the garlic till fragrant in hot oil.
- Turn up the heat and add the pork, fry till cooked. Minced meat clumps together, you have to break it up into smaller pieces while frying.
- Add the chilli sauce and half cup of hot water. When the sauce is boiling, reduce heat and add the tofu and cook for about 2-3mins. Add more water if you see the sauce drying up.
- Lastly, add in the cornflour mixture, stir gently (so the tofu won't break) until the sauce has thicken.
- Garnish with spring onion / parsley if you have, and serve with rice.

Monday, August 15, 2011

Berry Fruit Tart

I followed this recipe religiously and it was quite a success!
However, I am using a 7-8" tart pan, which is smaller than what this recipe calls for. So my pastry crust is a tad too thick. If you prefer a thinner crust, you may have to remove 10-20% of the dough depending on how thick you will like when you lay the dough out on the clingwrap.

Serves about 8.

To make the pastry crust

Ingredients
Plain flour - 195g
Salt - a pinch
Unsalted butter - 115g (at room temperature)
Caster sugar - 50g
Egg - 1 (lightly beaten)

Method
- Using the electric mixer, beat the butter until softened. Add sugar and beat till light and fluffy. Gradually add the egg, beating just until incorporated.
- In a separate bowl, whisk the flour with the salt.
- Combine the dry and the wet mixture and mix till it forms a soft dough.
- Lay it out on a piece of clingwrap and using your fingertips, flatten it out into an expanded shape of the tart pan. Wrap it up with the clingwrap and refrigerate for 30mins.
- Greaseproof the tart pan, I used a 7 - 8 inch and evenly spread the pastry dough onto the the pan right up to its edges. The dough breaks very easily but you can patch it up readily. Cover with clingwrap and place in freezer for about 15mins (I actually skip this stage and bake it right away; it turns out fine).
- Preheat oven to 205 degrees C with rack in centre of oven.
- Remove the pastry dough from the freezer and lightly prick the bottom with a fork. (to prevent the dough from puffing up when baking).
- Bake for 5mins, reduce the temperature to 180 degrees C and continue baking for about 15mins till the crust turns golden brown.
- Remove from oven and let it cool for about 5mins. Brush the pastry crust with a thin coat of beaten egg white, and bring it back to the oven for about 2mins. This is to prevent the crust from getting soggy when you lay the pastry cream on it.
- Allow the crust to cool completely before putting the pastry cream.

To make the pastry cream

Ingredients
Milk - 300ml
Vanilla bean - 1 split lengthwise (or 1 tsp of pure vanilla essence)
Egg yolks - 3
Caster sugar - 50g
Plain flour - 20g / 2 tbsp
Corn flour - 20g / 2 tbsp
Whipping cream - 100g

Method
- In a saucepan, heat up the milk and vanilla bean until the milk just begins to foam up. Keep stirring so it won't curdle. Remove from heat source and scrape out the vanilla seeds into the milk and leave it to cool abit.
- In a mixing bowl, mix the sugar and egg yolks with a spatula. Sieve the flour and cornflour together and then add to the egg mixture and mix till it's smooth.
- Add the milk slowly, whisking constantly to prevent curdling.
- Pour the whole mixture back into the saucepan and cook it till the mixture turns into a thick paste. You have to stir briskly to prevent the paste from sticking onto the pan.
- Remove from heat and if you are using vanilla essence, this is the time to add it in.
- Pour into a clean bowl and cover the surface with clingwrap to prevent a crust from forming.
- Cool to room temperature
- Beat the whipping cream till soft mounds are seen. Add enough (you may not need all) to the pastry cream till it forms a thick and soft consistency, but not too watery. I find that after the pastry cream cools, it hardens slightly so adding whipped cream will help.

To assemble fruit tart


Ingredients
Any fresh fruits that you like! However, after washing the fruits, pat them dry using kitchen napkins before laying them on the pastry cream.
Icing sugar (optional)

Method
- Remove the tart from the pan gently.
- Spread the pastry cream onto the bottom of the tart shell. (I did not use all the pastry cream I made which is a mistake, as the layer of cream is too thin compared to the pastry crust.)
- Place the fruits in any manner you like. Get creative here!
- If not serving immediately, cover with clingwrap and refrigerate but best to eat slightly chilled and on the same day.
- Sieve a thin layer of icing sugar on the fruits to make it even prettier!

Nigella's Marmite Pasta

If you need a quick fix lunch and will rather not have instant noodles, try this simple recipe that I saw from Nigella's website. Ready in 10 mins!

Serves 1

Ingredients
Marmite - 1 tsp
Angel hair pasta - 80g
Garlic - 3-4 cloves (chopped up)
Olive oil
Dried mix herbs
Salt
Cheese

Optional
Chestnut mushrooms - 100g (sliced into smaller pieces)
Bacon - 2 strips


Method
Add salt and olive oil into a big pot of boiling water and cook the pasta till al dente as per the packaging instructions. I used angel hair pasta as it only takes 2 mins to cook. When the pasta is cooked, drain off the water but keep aside half a cup of pasta water.

Meanwhile, heat up the pan and fry the garlic with 2 tablespoons of olive oil. Add the mushrooms and a dash of dried herbs; fry for 1-2minutes. Add the marmite and 1/4 cup of pasta water, the sauce will thicken shortly and mix it with the cooked pasta. If it's too dry, add abit more of the water.

Sprinkle shaved parmesan cheese and chilli flakes if you like. 

Friday, August 12, 2011

Dried Scallops with Shimeji Mushrooms and Broccoli

Serves 2

Ingredients
1 whole small stalk of brocolli (washed and cut)
1 bunch of brown shimeji mushrooms (washed, drained and roots removed)
5-6 dried scallops (pre-soaked for about 30mins, drained and break into tiny shreds)
Cooking oil (I used Canola oil)

Seasoning
1 tsp of light soya sauce
1.5 tbsp of oyster sauce
1 tbsp of hua tiao wine
1 tsp of cornflour dissolved in 2-3 tbsp of water

Method
- In a pot of boiling water, add a bit of salt and olive oil. Blanch the broccoli in the boiling water till it's cooked. I don't like it too soft, around 6-8 mins should do. Drain off the water and lay the stalks around your serving plate, forming a full circle.
- Add 2 tbsp of cooking oil into a heated frying pan / wok. On medium heat, fry the dried scallops till they look darker in colour. Add the mushrooms and as they cook, they will release alot of water. So you need not add any more water.
- Add the above seasoning in sequence and when the gravy boils and thickens, it's ready.
- Scoop up the mushrooms and lay them on the centre of plate, dribble the gravy on the broccoli.
- Serve while hot!

Japanese Beef Curry

Serves 2

Ingredients
200g of beef chunks (you can buy this from the deli section of most supermkts)
1 big yellow onion - sliced
1 mid sized carrot - cut into big pieces
1 big potato - cut into big pieces
1 tbsp butter
2 tbsp olive oil
Boiling water 
55g of Japanese HOT curry pre-mix (That's about 1/4 of the package)


Seasoning (beef)
Salt
Pepper
Dried mixed herbs - I use McCormick brand

Optional
Corn niblets / mixed peas - half a cup

Method
- Rinse the beef chunks and pat dry. Marinate with abit of salt, pepper and dried herbs. Set aside.
- Using a saucepan that you can both fry and stew the curry, heat up the butter in the pan on medium heat. Don't burn the butter. Brown the beef chunks on both sides on high heat. Remove from pan when both sides are browned and half cooked. 
- There'll be some beef juices left in the pan, use that to fry the onions, add some olive oil if it's too dry.
- Cooked the onions till they are soft and brown, add in the beef chunks and carrots. Add boiling water till all the ingredients are fully submerged. Cover the pan and bring to a boil. 
- Turn the heat to low and continue stewing the beef for about 1hour till it softens. Check periodically and give it a quick stir to make sure there are no pieces of meat/vege stuck onto the bottom of pan. Add more water if necessary. Add the potatoes when the beef has been cooking for about 30-45mins.
- After 1-1.5 hours, add in the curry pre-mix and cook for another 20mins on low heat. This is also the time to put in the corn bits. Add more water if the curry is too thick.
- Serve with white rice/udon.

Note
- Avoid cutting the vegetables too small. Because after 2 hours of stewing, they will disintegrate!
- I find that the curry dries up quite quickly so I have to keep adding water. 
- Instead of beef, you can replace with chicken but preferably boneless thigh meat cos it's more tender than breast meat. 
- It's good if you have at least 1.5 - 2 hours to stew the beef, otherwise, it may not be tender enough. If you use chicken, it probably won't take as long.